
Before starting to create the character model of the clown, I needed image planes in order to base the model on. By adding these image planes into the front and side view respectively, it allowed me to begin creating a model based on a body, which helped me to get the proportions of the body correct, along with keeping everything in scale.
I started off by creating the torso of the clown by creating a cylinder polygon with 8 subdivisions on the axis, and 4 subdivisions on the height of the cylinder. I then proceeded to move and resize the cylinder as a whole until it was in the right position over the torso of the image plane. By selecting the vertices of the cylinder, I scaled each row of vertices until they fit along the images torso. I did this in the wire frame mode in order to more easily select the vertices on the back of the cylinder so I knew I was moving the whole shape and not just the front of the polygon so I kept the body symmetrical.
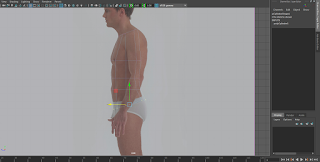 I then did the same process in the side view in order to get the thickness of the body correct in relation to the image plane. In the side view however, I also rotated to top layer of vertices in order to get the correct angle for the neck of model as the neck is at a different angle to the back and it was important to capture that when creating the torso for my character. I also did the same for the bottom layer of vertices in order to capture the rotation of pelvic region so I could match the torso up with the legs more easily.
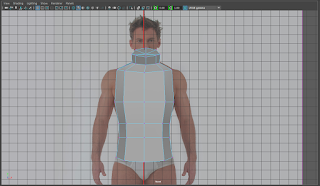 After making sure that the basic shape of the torso was created, I then selected the top faces of the cylinder and extruded them. I dragged the extrusion out of the torso and then made it smaller in order to represent the clavicle region of the body. I then extruded again from this, and resized in order to create the characters neck, which is why it was important for the top of the cylinder to be at the correct angle. Finally, I also extruded form the top side faces in order to create the shoulder region, which is the area in which I will connect the arm to the torso.
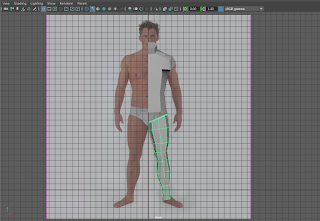 After creating the neck area I continued to tweak the vertices, edges and faces of the model, using the F9, F10 and F11 shortcuts respectively in order to quickly switch between each of the different modes and creating the most accurate basic model of the torso that I could, before moving on to the creation of the leg. I first created a cylinder with 8 subdivision axis and 6 subdivisions for the height and then made the cylinder the correct length and width for the leg. By using the rows of vertices created by the cylinder shape I then tweaked each row until there was a basic leg shape, For the calf region I used the insert edge loop tool in order to add another row in order to add shape to the calf and show the size difference between the calf and the knee and make it visibly different to the ankle. Finally, I rotated the top row of vertices to face inwards, which is where the leg will connect to the torso and the pelvic region. I proceeded to do the same thing in the side view, pulling the leg back and adjusting the vertices in order to create the leg shape and have the correct thickness in the thigh and calf area.
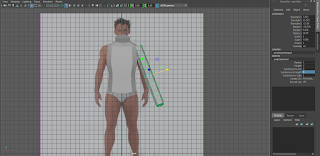
To create the arm I used another cylinder, this time with a subdivision axis and height of 6. I resized the arm and then lined it up with image plane, using the side view in order to get the thickness of the arm correctly in scale. However in the side view you can clearly see that the arm is not straight and is curved inwards instead. In order to add this curvature to the arm I selected the bottom 4 rows of vertices which represents the forearm that needs to be rotated. By holding the D key it allowed me to change the pivot point from the center of the vertices which I have selected, and move it up to the elbow area of the image plane, which is where the arm is bent. By rotating from this position I was able to get the correct rotation without messing up the rest of the arm by rotating it from the wrong position and then have to re position the rest of the arm in turn. After this was completed I edited the arm by moving each row of vertices in the cylinder in order to capture the shape of the arm along with the basic anatomy of the arm until I had the arm shape that I was happy with.
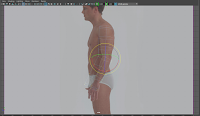 |
| Rotating the arm with corrected pivot. |
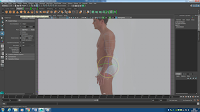 |
| Rotating the arm normally. |
When I was happy with the all of the models that I had created for the body I deleted the left half of the torso in order to have just half of the body, along with the faces on the top of the arm, the shoulder region, the bottom of the torso and the tops of the legs in order to make sure that when connecting the parts together later I wouldn't have any inside faces in the character.. I then selected the arm and used the snap to vertex feature by holding the V key in order to snap each of the vertices on the top row of the arm to the previously created shoulder region. Due to the way that I created the arm and the shoulder region the number of vertices matched up perfectly, meaning that the arm connected perfectly to the rest of the body, which left me with the arm being connected with the torso, and the leg currently separate.
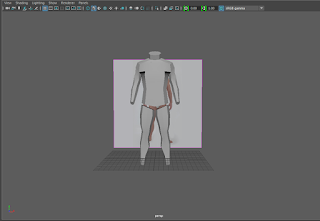 By selecting each individual part that I had created, I grouped them together so I could select all of the parts when just selecting one. With all the parts of the body selected I then used the duplicate special feature in the edit menu. What this allowed me to was to duplicate the side of the body that I had already created and flip it onto the other side which means that the body will be symmetrical. Furthermore, by choosing to make the duplicate an instance of the model rather that just a copy it allowed me to be able to model just one side of the body, and when doing so, the changes would automatically be made on the other side also, which helped to keep the body symmetrical even when tweaking later.
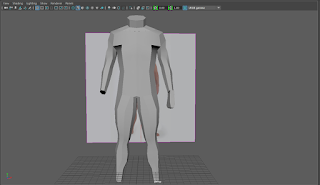 Using the same process as connecting the arms, I then connected the legs to the torso in order to have the basic body shape completed. After tweaking the whole body so that it legs correct in regards to the reference image that I am using I began working on the hands of the character. In order to create the hands I used a cube polygon instead of a cylinder as it fits the shape of a fist and a hand much better that a cylinder. The cube that I used had a subdivision width of 1, a subdivision height of 2 and a subdivision depth of 4. I then edited the cube until it had the shape of a hand without fingers, with the four faces that I created in the subdivision depth facing outwards to where the fingers would be.
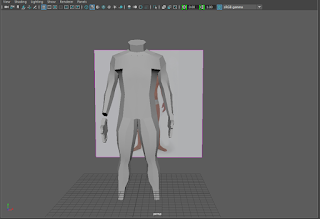 I then extruded those four faces, selecting the option to not keep the faces together in order to create the fingers. I then used the insert edge loop tool to create the second set of knuckles in the fingers, changing the tool settings in order to add multiple edge loops that are an equal distance apart, and then using the new vertices to create the changing thickness of the fingers. For the thumb I created a second cube and modelled it to look like a thumb. To connect it to the hand I deleted two of the outward facing faces on the hand, and the faces on the thumb where it connects to the hand. I then snapped the vertices between the empty faces of the thumb and the hand together in order to complete the whole hand before making sure that the hands where in the correct positions in relation to the image plane. Finally, I grouped the thumb and the hand together and then copied it over to the other arm in order to finish the top half of the body.
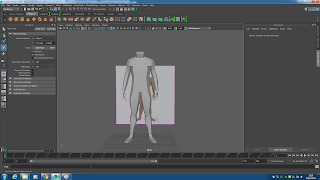 One of the final parts of the body to create was that of the feet, which I did by creating a poly cube with 2 subdivisions on the width, 1 for the height and 3 for the depth. I didn't spend much time creating the foot due to fact that my character will be wearing shoes and therefore I didn't need to model the toes. All I did was model the cube so that it's shape was correct in the shape of a foot, making sure it sloped downwards, before deleting the top faces of the ankle area and the bottom of the leg before snapping the vertices together and completing the rest of character apart from the head.
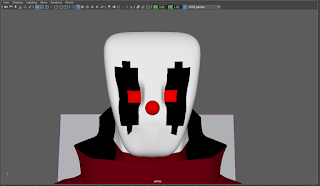 To create the head I used a basic cube shape and edited using the image plane as guidance in order to create the basic head shape, and then deleting the bottom faces, along with the faces on the neck and connected them together to create the head. In the front view I then selected to faces that were in front of the eyes on the image plane and the indented them into the head in order to create an area for the eyes to go. Due to the fact that my character is a clown, I used a simple red sphere for the nose. I then double clicked in face mode to select all of the faces on the head, and assigned them a new Lambert material which I coloured white to represent to clowns face paint. I then selected the faces I used for the eyes and made them a red colour, before selecting the faces around the eyes and making them black. I decided that I was going to leave the head like this because it looked quite deformed and that helped to create the scary character that I was trying to create for my game.
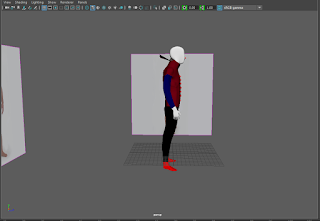 Finally, I created the clothing for the character. I realised that I had accidentally extruded the whole circular edges around the neck sometime when creating the model, so I decided to use this to create a large collar for the clown in order to add more detail. I also added to flairs to the back of this by extruding the back edges of the collar to help make him look like an evil circus clown. I added red spheres down the center of the body to make it look like classic clown attire with the bobbles down the middle of the clothes. I then used the same method as the head in order to colour the clothes, sticking with a basic colour scheme of darker reds, blues and black in order to help accentuate the clowns freaky face. I used the smooth option to smooth the model out and increase the amount of detail on the model, before going over it one more time to make sure I was happy with everything, tweaking areas slightly in order to make them look more realistic until I was left with my final model.
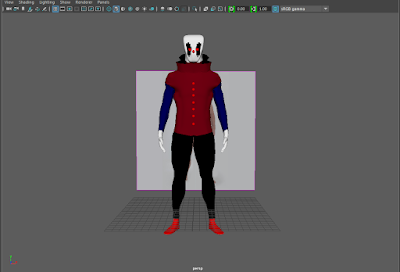 |
| The finished model. |
Considering this is my first time creating a character model in Maya I think it went quite well. I think the character looks fairly like a clown, and I'm really happy with how the legs in particular turned out. However, I had a lot of problems with the arms and the shoulder region and it turned into a bit of a mess when connecting them up. Furthermore, there are a lot of areas that could do with being cleaned up as they are a bit patchy, especially on the sides of the torso. I'm happy with how the hands turned out, although I think they might be a bit big in relation with the rest of the character, it does work with the clown theme in which they where large white gloves. Furthermore, I'm happy with the way I changed a problem with the accidental extrusion into clothing for the clown. The biggest problem with the model is the texturing due to the fact that I just used basic colours in order to texture the clown, just using the Lambert material in Maya to do so. If I was going to recreate this clown I would definitely learn how to texture characters better along with getting better at connecting body parts to each other in a less messy way. I have learnt a lot however, such as using basic shapes such as cylinders in order to create each part of the body, and also learning to add detail by using whole rows to get the basic shape before using individual vertices to help shape the anatomy of the body. Furthermore, I would learn more about the human body before redoing this in order to get a better handle on creating muscular definition of the bodies. Overall, however, I think it went well and I'm happy with the outcome of the creepy clown character that I created.
Feedback from Noel: Overall I think you've done a good job of the model. The shape is pretty good and I quite like the design of his head. Makes it look creepier and weirder. Something you could do is add some textures to make his clothing more detailed.
Kori: Overall the design of the character is good with cool features to make the character look strong. If I had to change or edit something it would be to add some textures rather than solid colours.
Maybe one day you may become a boss like me.


No comments:
Post a Comment